Alocasia is a controversial plant in the sense that opinions differ about the possibility of keeping this exotic beauty. Some say that alocasia do not live in an apartment for a long time, that it is a purely greenhouse plant, others refute this opinion, successfully growing and even propagating alocasia at home . I would rather agree with the latter – never did alocasia cause any particular difficulties in my care. During our “cooperation” with her, I learned that she does not tolerate the cold, and in combination with excessive watering, this is generally death, though not for the plant itself, but for the leaves, which, most likely, will have to be cut if you do not keep the plant warm and continue to water abundantly while doing so.
Growing Alocasia of bulbs/corms/nodules
During transplanting, small bulbs/corms/nodules can be found on the roots of an adult plant. Ripe bulbs that are ready for germination fall off the roots by themselves – you shouldn’t pull them off on purpose.
If you nevertheless become the proud owner of alocasia bulbs, don’t rush to throw them away, because you can get new plants from them. This process, however, is long. For prophylaxis, the bulb can be soaked in epine, kept in solution from several hours to a day. Also, in order to protect it from rot, you can treat the bulb with potassium permanganate, a weak, light pink solution. Or you can wrap the bulbs in a tree-like aloe leaf cut along the length. They are left in this state for a day.
Then bulbs can be dug into the soil . For germination, you can also use coco-soil. For successful germination, the soil temperature should be 27-30 ° C – you can put a mini-greenhouse on the windowsill, under which the battery is located – then the high temperature is provided. Do not forget to ventilate the greenhouse and water it in time so that the bulbs do not dry out.
If you used cocoa soil, then after germination, the appearance of several leaves, the plants are transplanted into light acidic soil. Keep in mind that both young and adult alocasia plants need to be sprayed frequently.
Alocasia Reanimation
If the plant is sick, I advise in any case not to give up hope until the last. Moreover, if this plant belongs to the aroids. Calathea, ktenante, alocasia and aglaonema are surprisingly tenacious plants, especially if the factor that has a detrimental effect on them is eliminated in time.
Even if alocasia has lost all the leaves, this is not a reason to carry the pot to the trash heap. Firstly, it is possible to obtain new young plants from bulbs (the technology is described above). Secondly, even a plant without leaves is able to recover completely after a while. Alocasia has a shortened trunk – it is of the main value for us, because it has dormant buds.
First, inspect the plant, if there is rot on it, remove it and always with a supply of healthy tissue. Then you need to cut off all the rotten and damaged roots. Do not be afraid if after this operation there are no roots left at all, the main thing is not to let the rot spread further, because for the bud germination it will be necessary to keep the plants in conditions of high humidity and warmth, and these are ideal conditions for the development of rot, so it must be removed very carefully. Sprinkle the slices with charcoal, you can sprinkle with activated carbon crumbs. Next, you need to wrap the trunk with moss and live in a transparent container. (mini-greenhouse) You don’t need to ventilate, but be sure to moisten it regularly so that the trunk does not dry out.
You will be surprised when after a while roots appear from a seemingly lifeless “stump”, and then leaves. When the plant grows up, it can be transplanted into the soil mixture, but it is still advisable to keep the plants under a jar or in a mini-greenhouse for some time, until the root system grows.
Dormant period
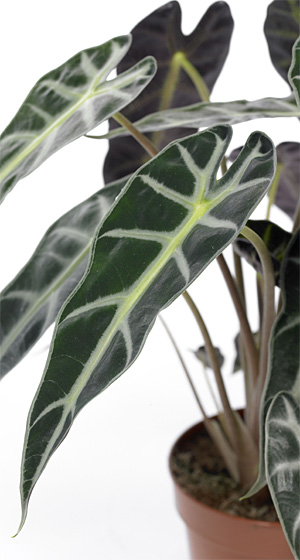
Who would have thought, but peace is good for alocasia. In autumn, the leaves begin to turn yellow, they can be cut off during this period, and the plant itself is removed from the windowsill. Watering is greatly reduced. Alocasia can be exposed to light in January-February, watering is increased gradually until leaves appear. After such a rest, Sander’s alocasia grows up to 8 large leaves.
In Richmond VA, I have Alocasia growing outside and spreading fairly quickly.. It was in a pot (inside during cold months), but volunteered about 30′ from where the pot was, went dormant, but came back very lushly and is spreading. I was surprised!